I’ve been a huge fan of flying in VR ever since it was added to X-Plane 11. But Microsoft Flight Simulator has taken the immersion to a whole new level, seriously approaching the feel of a real flight. In a never-ending quest for more realism, I started looking into the Buttkicker so I could feel the takeoffs, landings, and gear extensions, but I quickly found that you can build your own for under $100. This guide will show you how!
Overview
The concept behind all bass shakers is simple. They’re just speakers with the diaphragm (the part that pushes air) removed, so they send their vibrations through another material instead. In this case, it’s your chair! Like speakers, they need an amp to drive them, which takes its cues from a sound card. You may be able to use your motherboard’s sound card, but using a separate one is simpler and enables a more advanced setup.
Parts List
- A chair with a plywood bottom that you’re okay modding (I used an IKEA Renberget)
- Two Dayton Audio TT25-8 Tactile Transducers
- Kinter K2020A+ Amp
- USB Sound Card
- 3.5mm Aux Cable
- Hordion 2.75” Hole Saw Bit
- 3/4” wood screws
You’ll also need a cordless drill for the hole saw bit.
Step 1: Drilling Holes
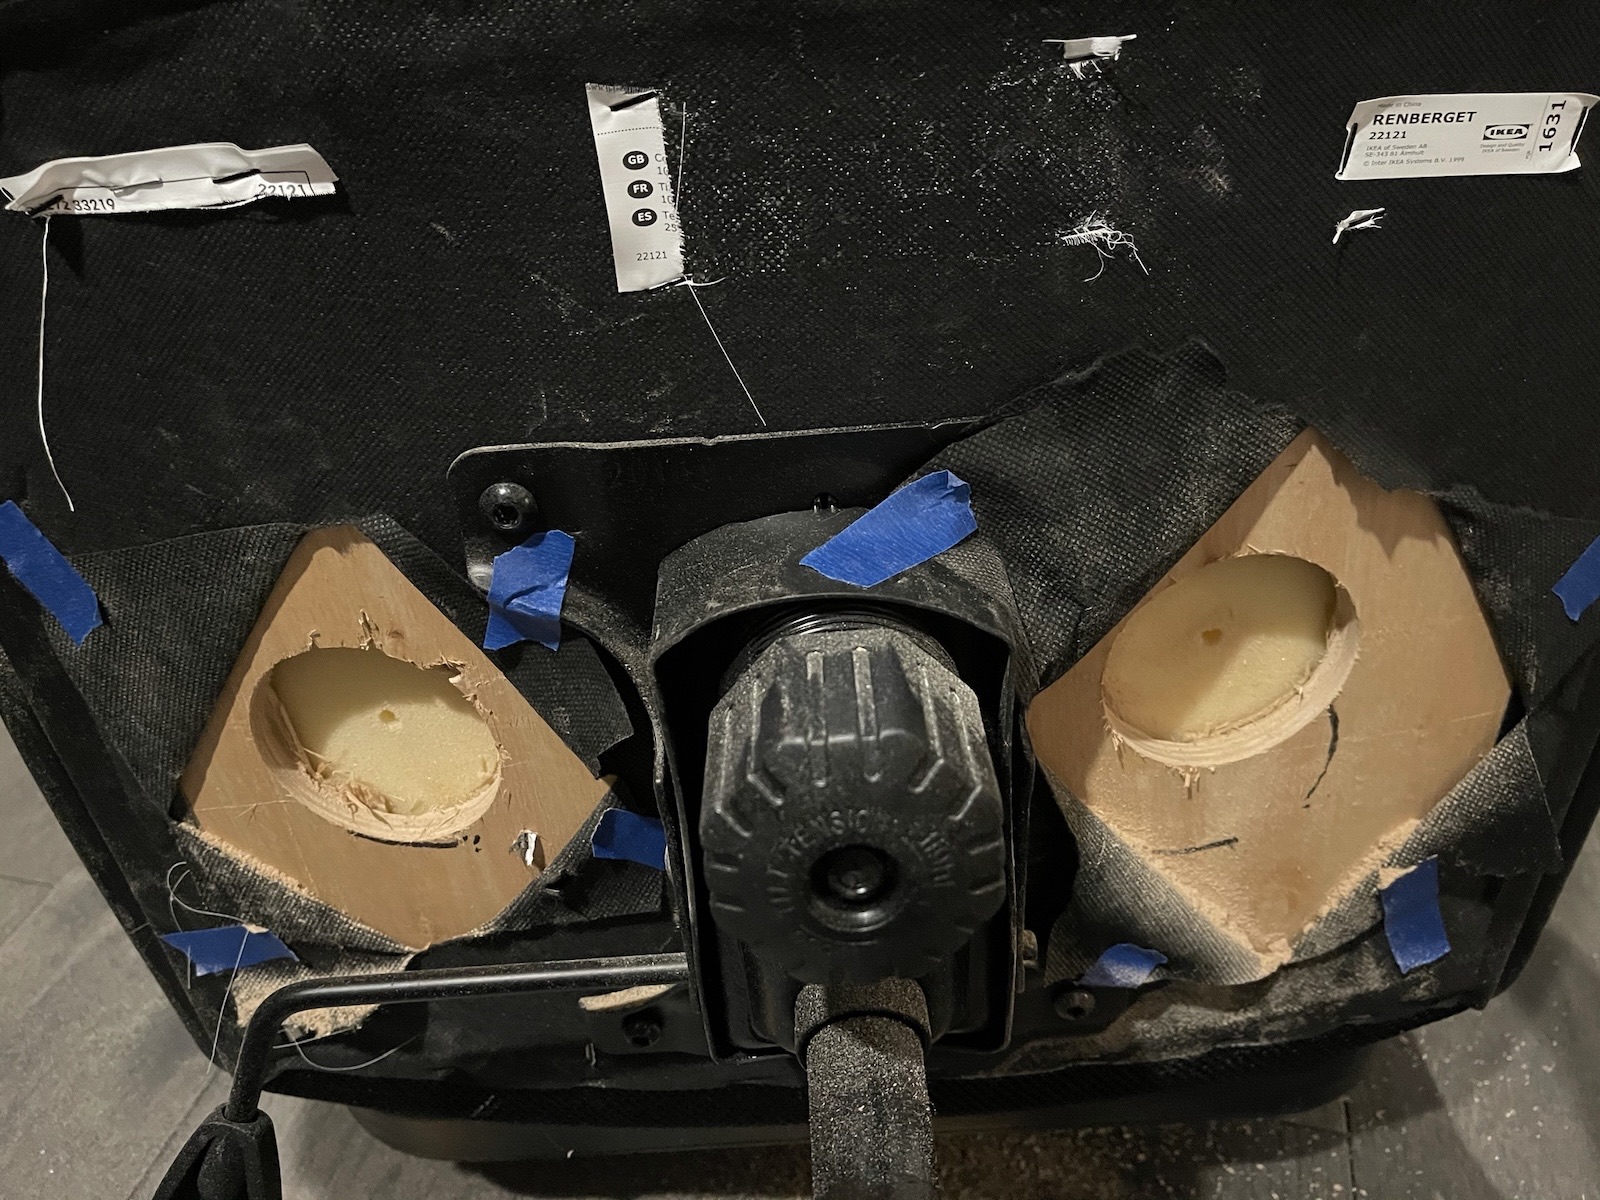
To start, we need to drill two holes in the bottom of the chair so the transducers can couple tightly to the seat. I had a simple chair, so I carefully cut slits into the fabric on the underside and used the 2.75” hole saw to drill through the plywood until it punched through to the foam of the seat. Two holes, one under each side of where you sit, spread the vibration evenly.
Go slow as you break through so you don’t chew into the foam or tear the fabric on top. Every chair is different, so check what’s above the plywood before you commit to a spot.
Step 2: Mounting
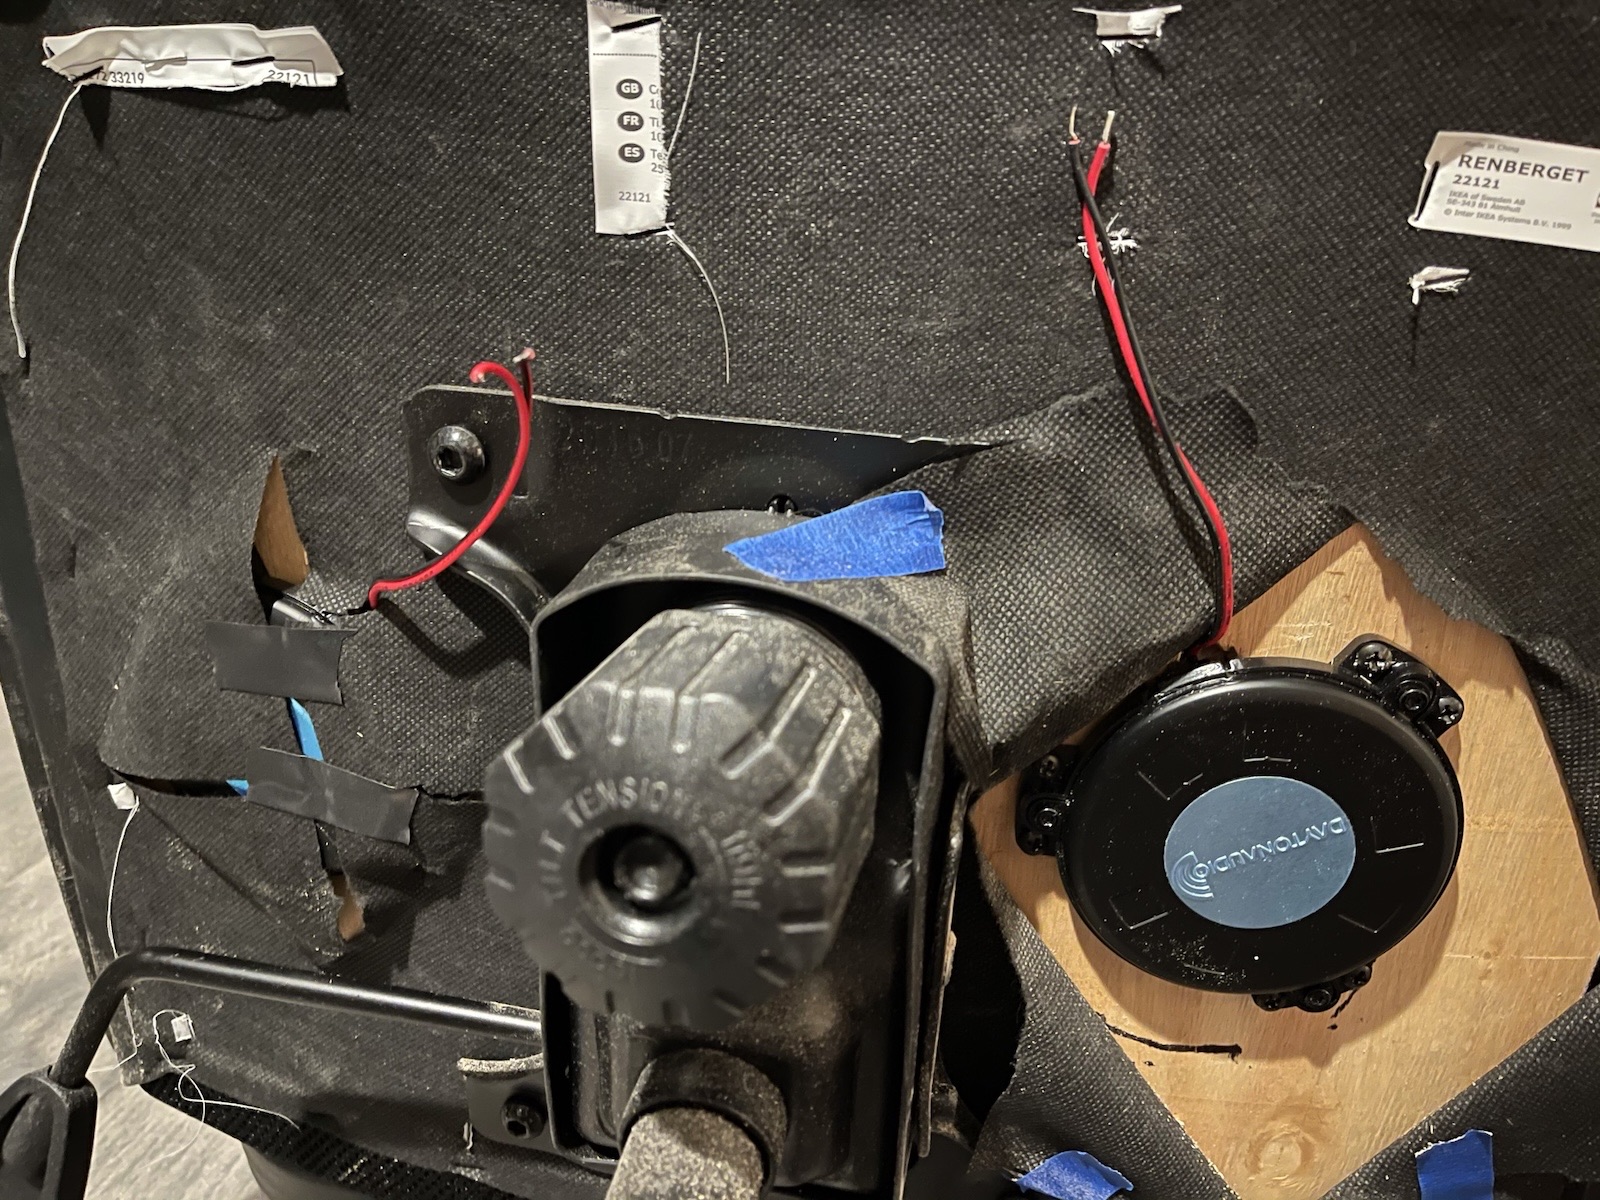
Drop a transducer into each hole and secure it to the plywood by driving the 3/4” wood screws through its mounting tabs. Seating them into the holes lets the transducers couple straight to the seat foam, so the vibration travels up into you instead of just rattling the plywood. Cover up the transducers with upholstery fabric if you wish.
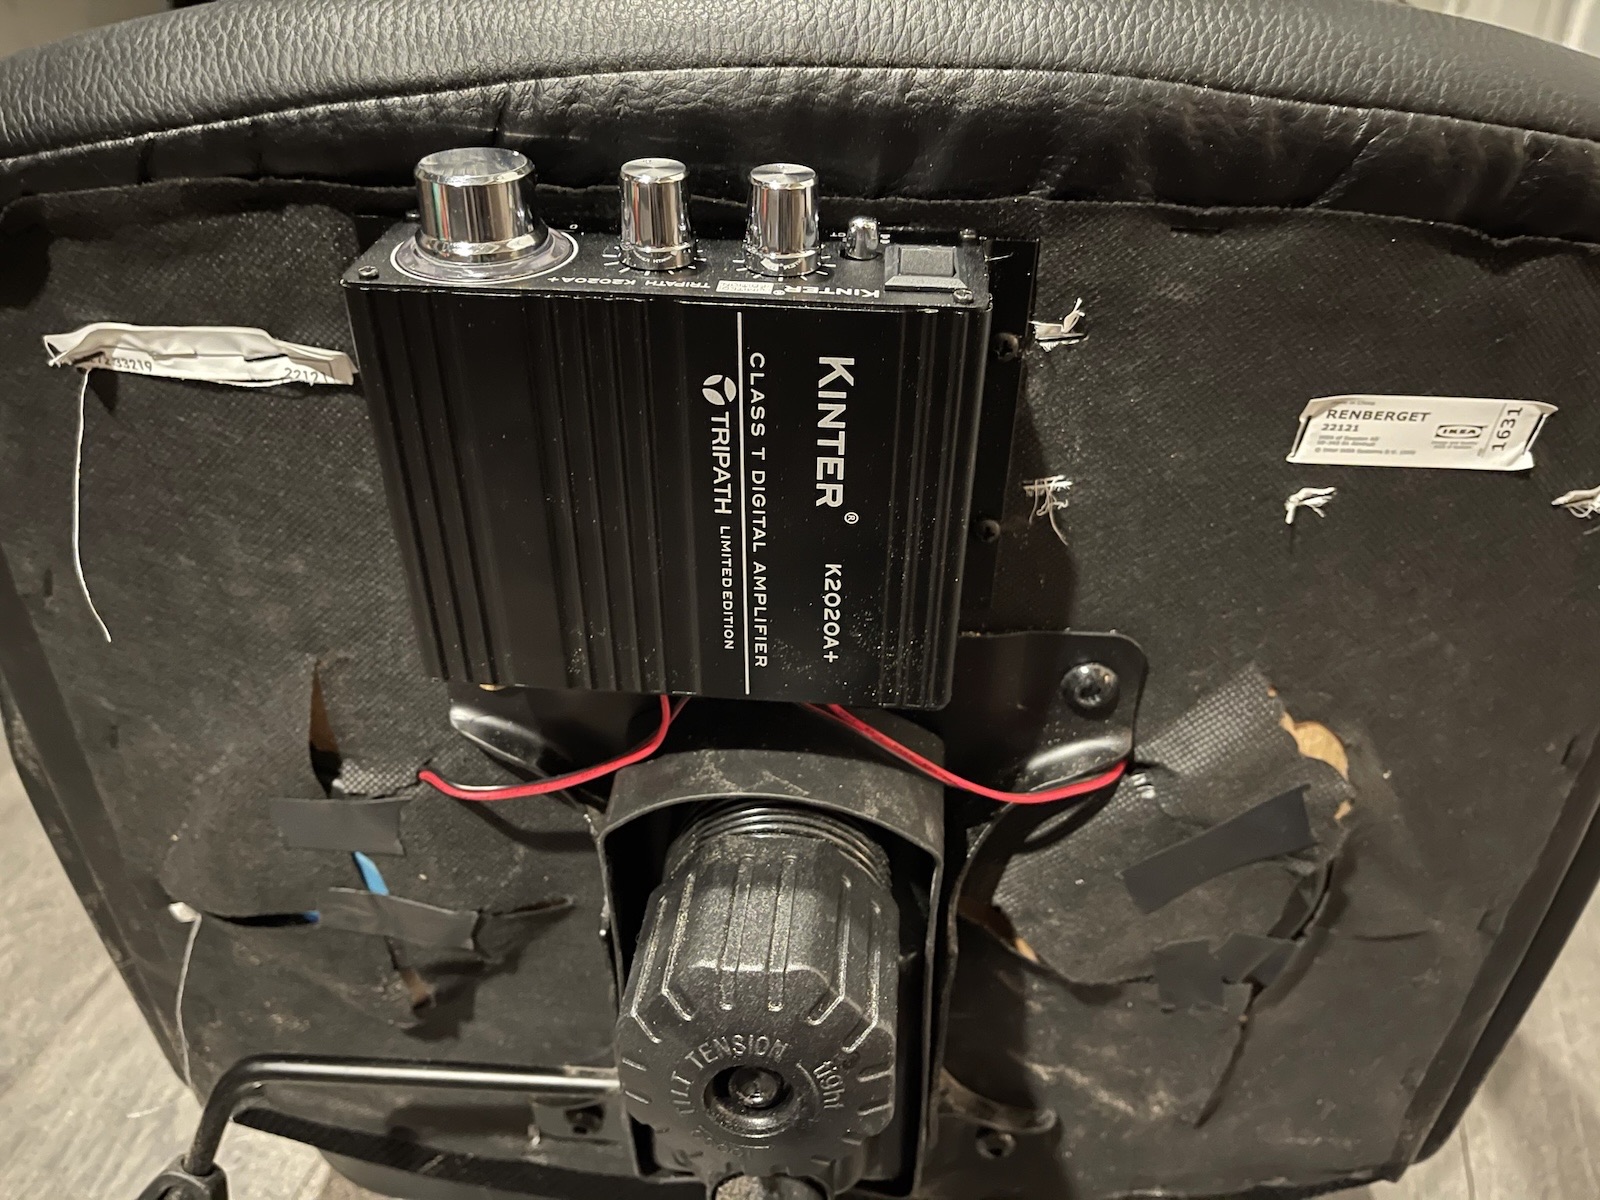
Next, mount the amp somewhere out of the way. I screwed mine to the front underside of the chair so its knobs stay within reach. Run speaker wire from each transducer back to the amp’s output terminals, keeping the polarity consistent (positive to positive, negative to negative), then connect the amp to the USB sound card with the 3.5mm aux cable.
That’s the whole chain: the sound card feeds the amp, the amp drives the transducers, and the transducers shake the chair.
Step 3: Software
The last piece is sending only the low frequencies to the shaker while your headset still gets full-range audio. The TT25 is a tactile transducer with no diaphragm, so it mostly turns the low end into motion on its own, but it can still buzz on the higher frequencies. I use Voicemeeter Banana, a free virtual audio mixer, to split the signal.
- Install Voicemeeter Banana.
- In Windows sound settings, set the default playback device to Voicemeeter Input. Now all your audio, including MSFS, flows into Voicemeeter.
- In Voicemeeter, click the A1 label and choose your headset or VR audio device, then click A2 and choose the USB sound card driving the amp.
- On the Voicemeeter VAIO input strip (the one carrying your Windows audio), enable both A1 and A2 so the same audio reaches your ears and the shaker.
- Now low-pass the shaker. Voicemeeter Banana has a parametric EQ built into each hardware output bus, so open the EQ on the A2 bus and roll everything off above ~80-100 Hz. Because the filter lives on the bus, your headset on A1 stays full-range. Alternatively, you can use the Kinter amp’s bass and treble knobs without touching the EQ.
And that’s it! Fire up MSFS with its audio going to the default Windows device, and you’ll feel the engine rumble, gear thunks, and every hard landing right through the seat.